Senior Public Health Nurse Tutorials
Senior Public Health Nurses use this portal to assign case investigations, monitor follow-up activity, review surveillance information, and support field operations. The exercises below provide guided practice in the main tasks carried out in the portal.
Before You Begin
This training page is available only to authorized users. If you are viewing this page and your name appears in the header, you have already signed in successfully. You may now proceed with the exercises below.
Exercise 1. Assign Case Investigation to Field Nurse
Scenario: It is Monday morning and several new Class 1 disease notifications have already been reviewed and verified. These cases now require field investigation. As the Senior Public Health Nurse, you are responsible for deciding which nurse should receive each case. In doing so, you must consider urgency, geography, and staff workload. Some cases may be routine, while others may involve conditions that require urgent follow-up. Your task is not simply to assign work, but to make sure that investigations are distributed in a practical and timely way so that no important case is left unattended.
Steps
-
Click on the Assign Case Investigation card from the portal.
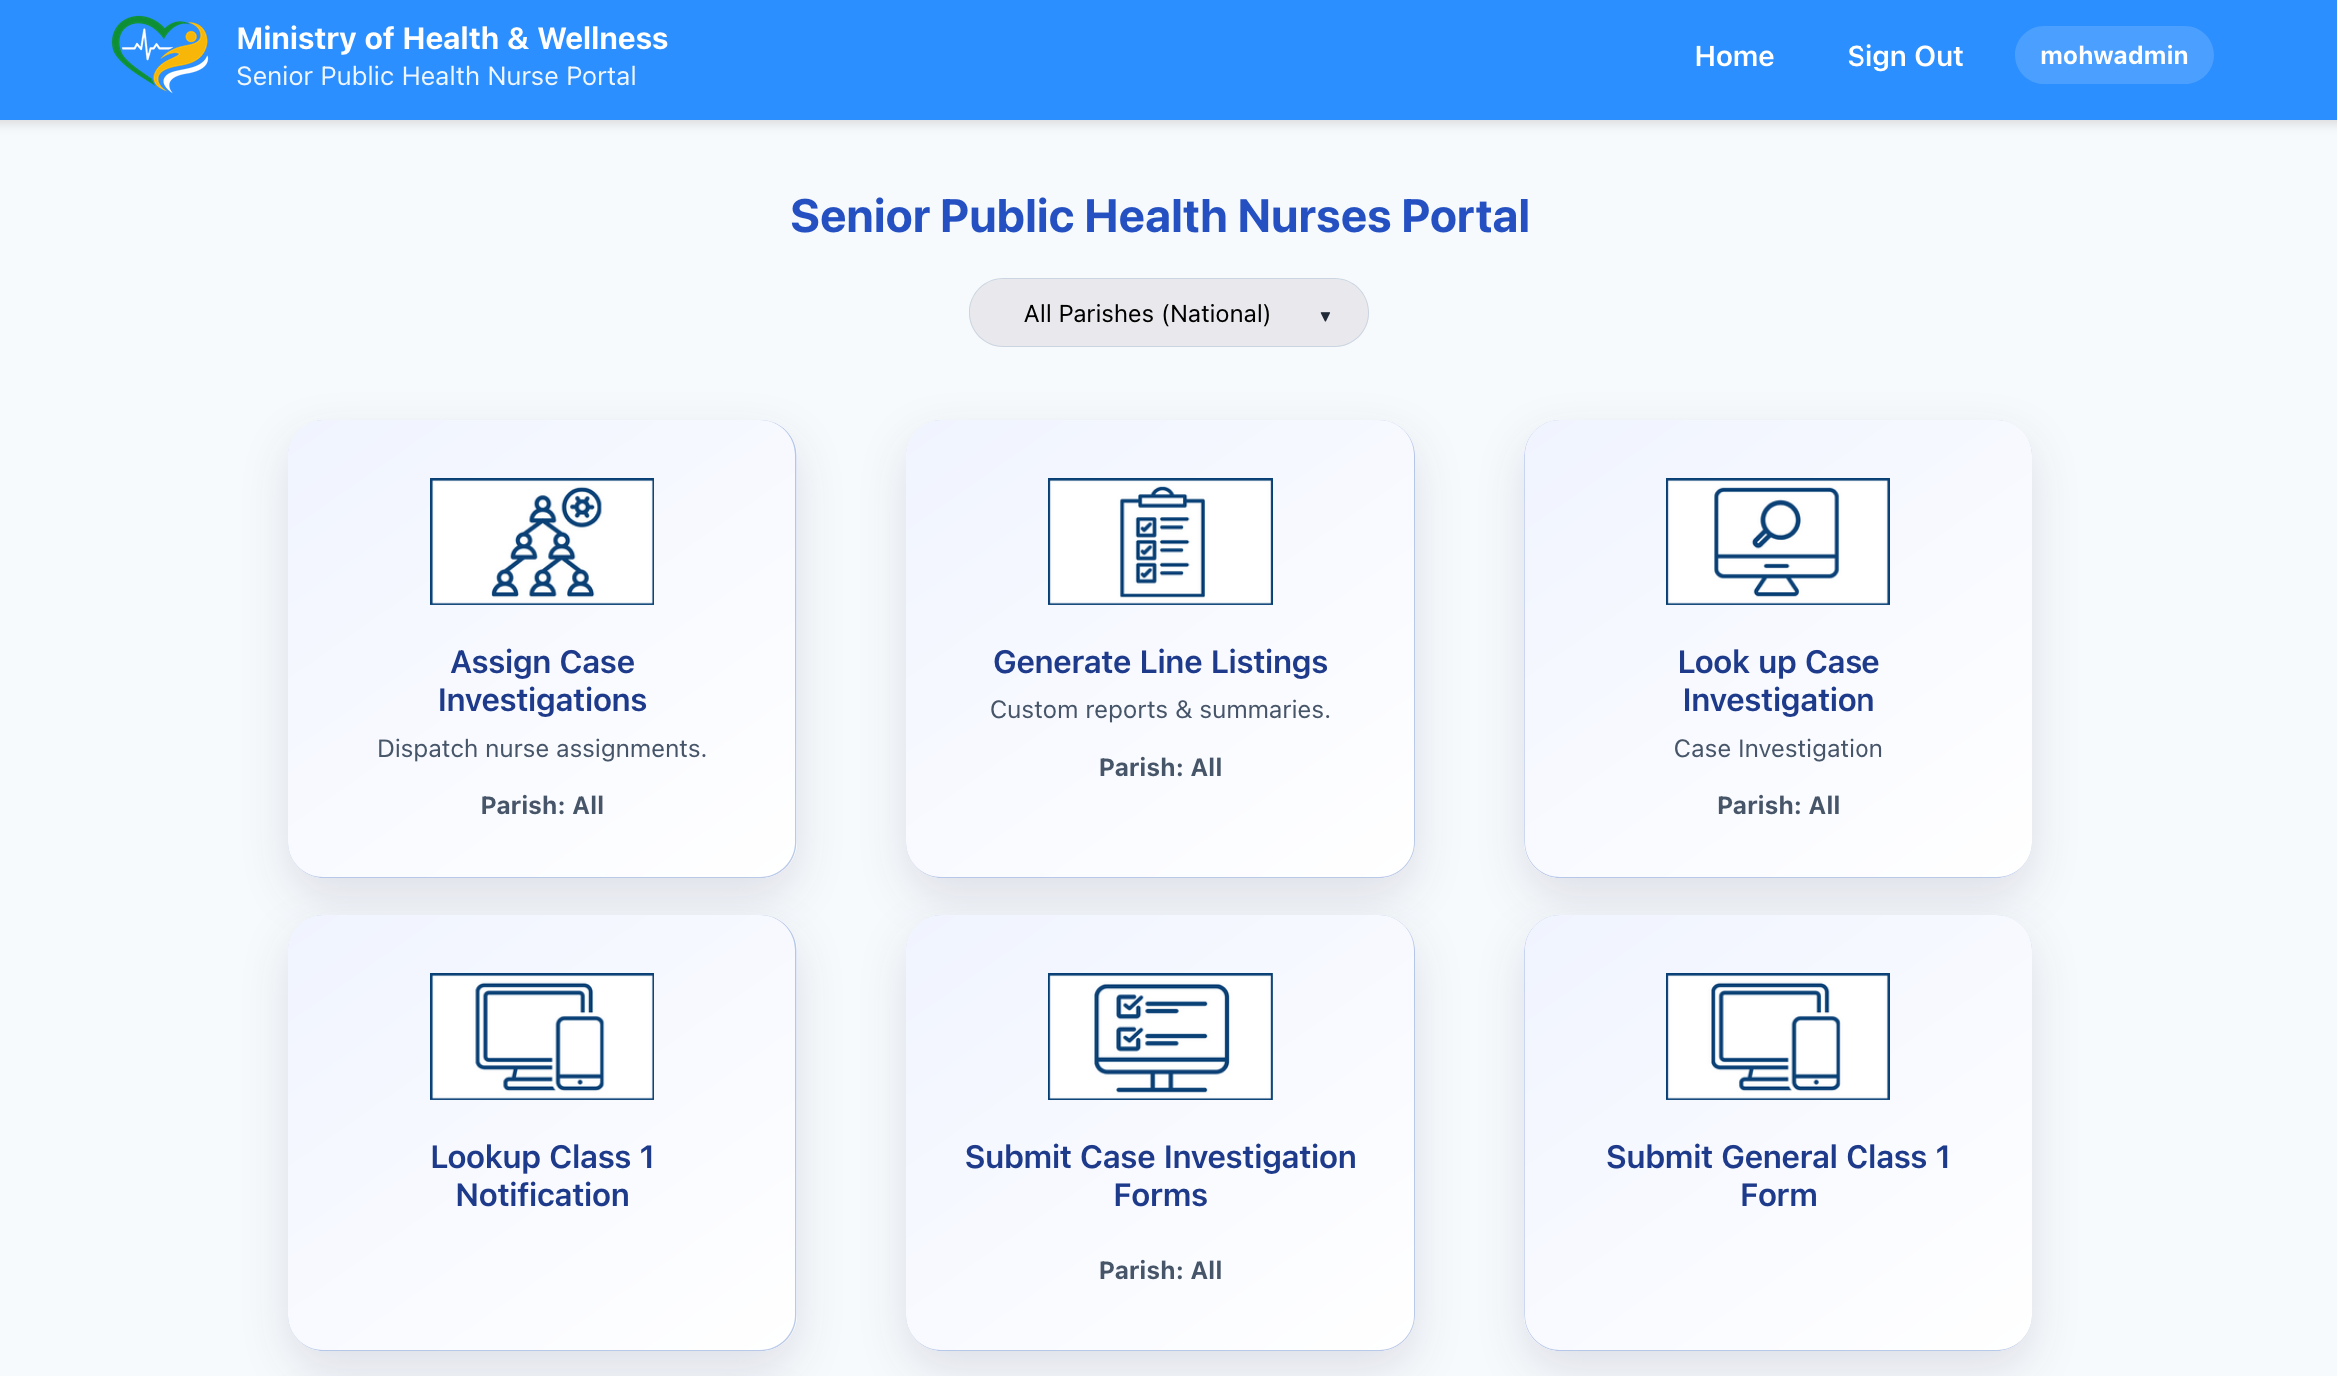
Figure 1.1: Assign Case Investigation card on the portal
- The Assign Nurses app appears.
-
Review the Active Queue of available cases.
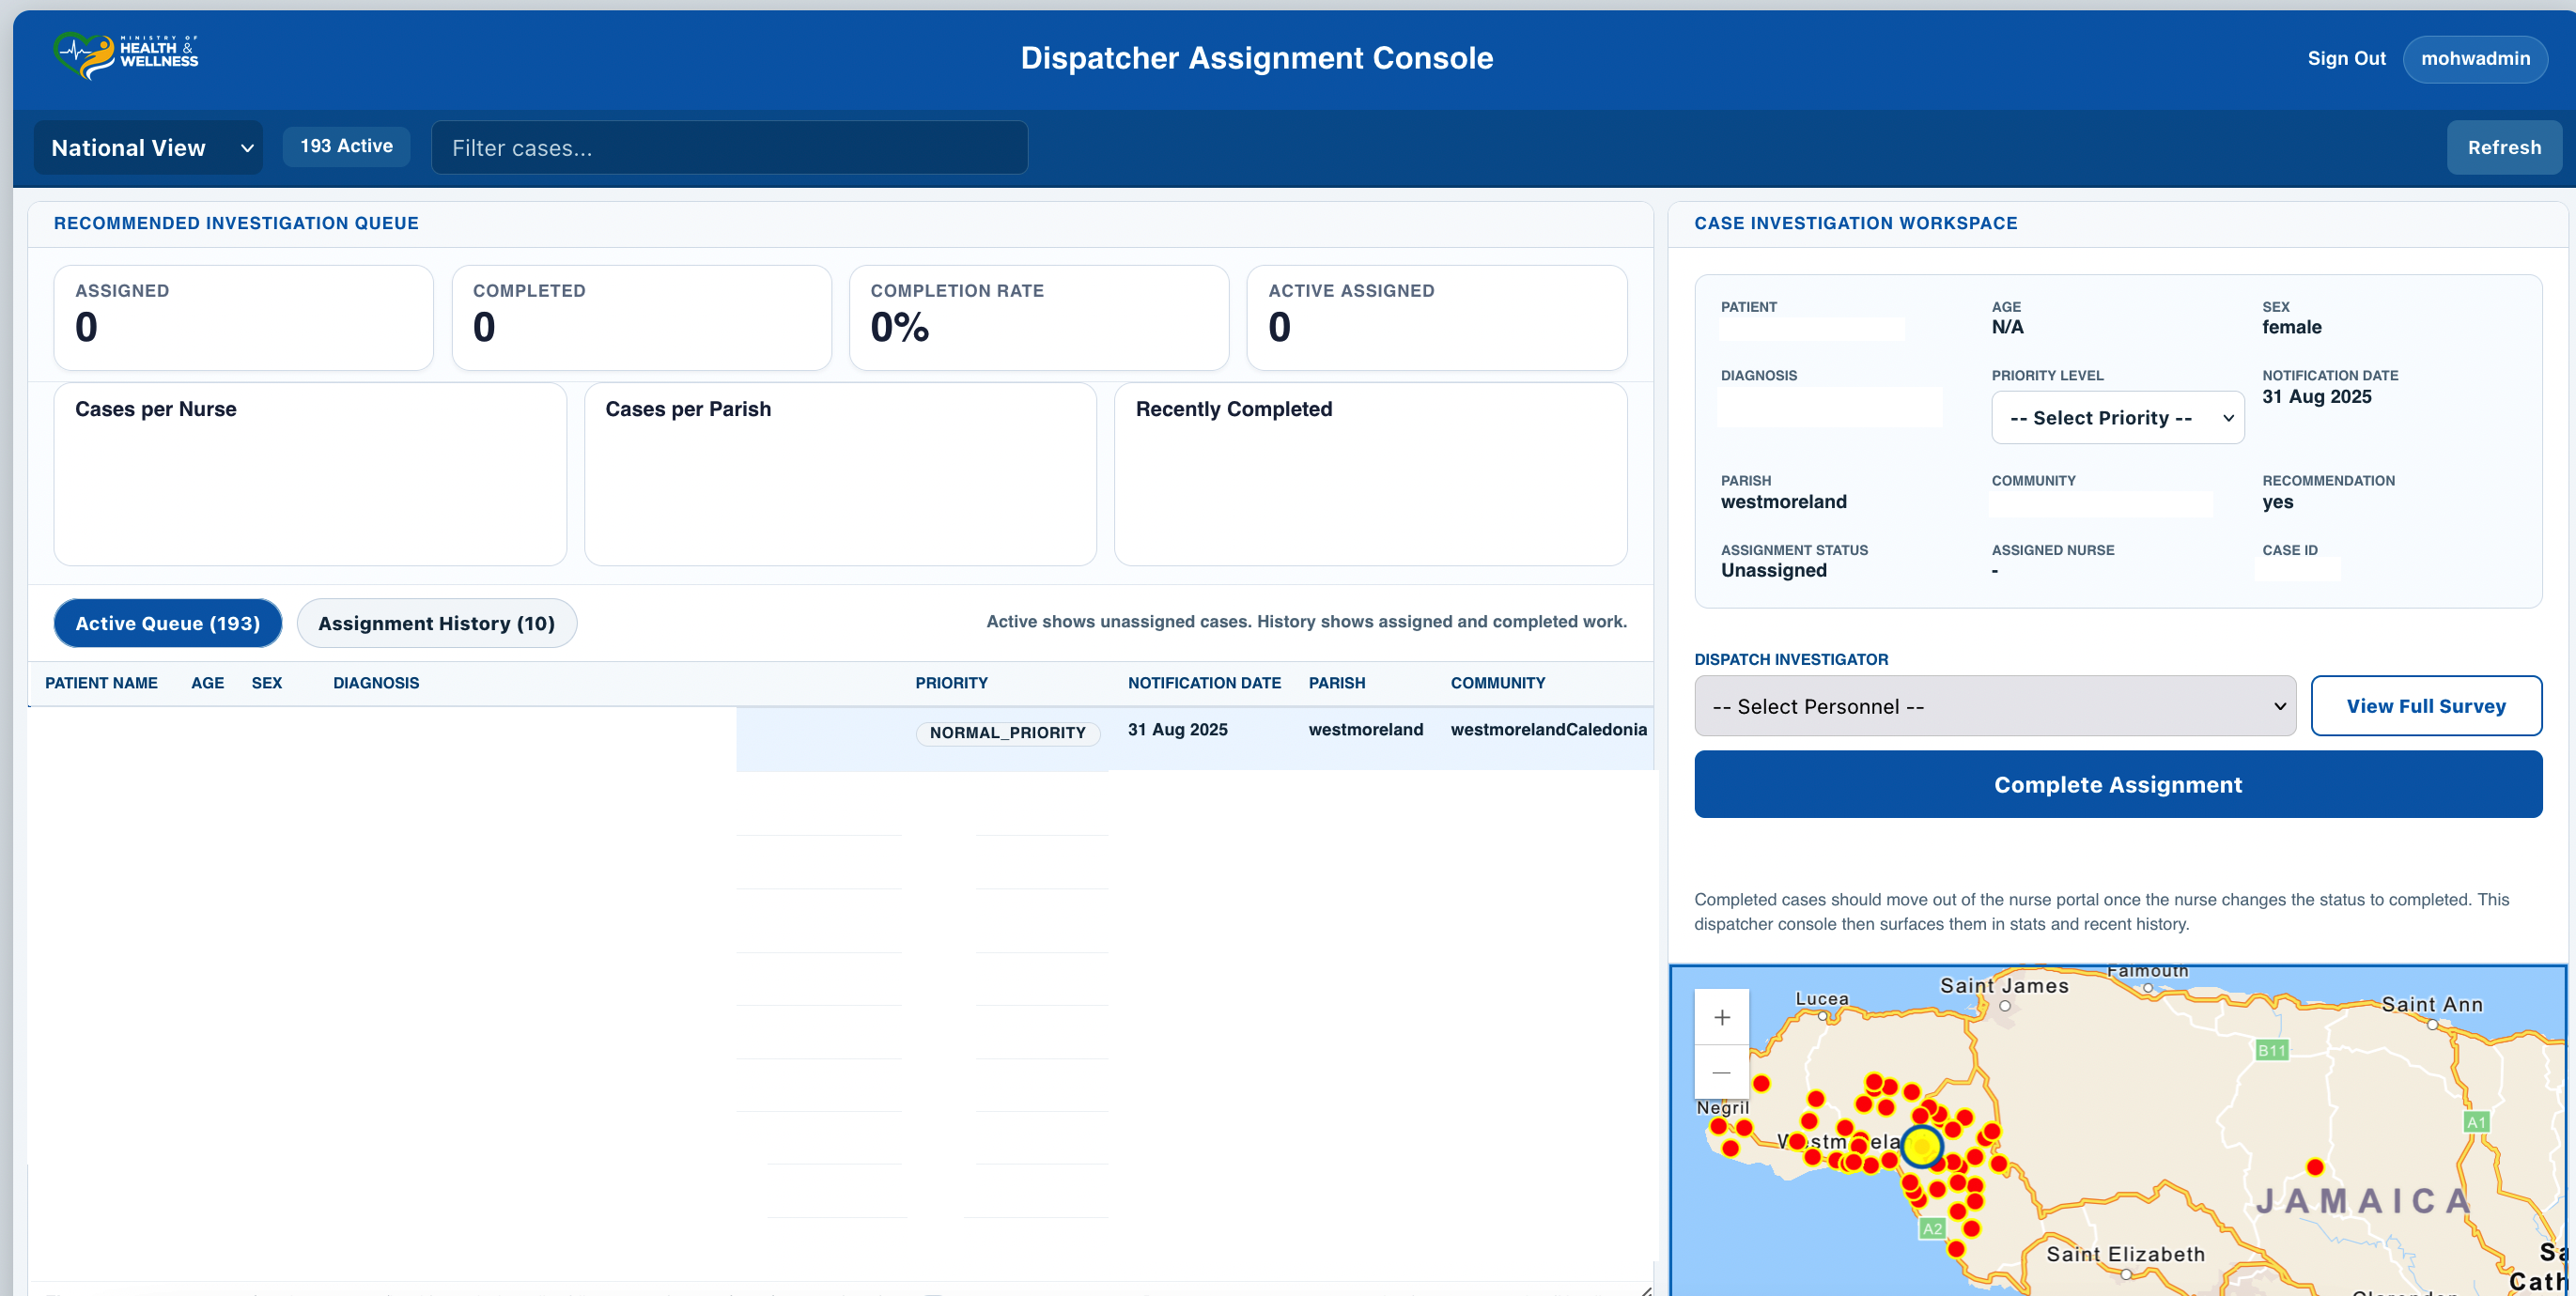
Figure 1.2: Active queue in the Assign Nurses app
- Use filters such as parish, disease, or status if needed.
- Select a case for review.
- Examine the patient information, disease, location, and any notes or indicators shown in the record.
- Set or confirm the priority level.
- Select an appropriate nurse from the Assigned To dropdown.
- Click Update or Assign to complete the assignment.
Expected Result
- The case is removed from the active unassigned queue.
- The assigned nurse can now see the case in the nurse portal.
- The assignment is recorded in the system.
Check History
- Click on the Assignment History tab.
- Confirm that the case appears in the history. This shows that the assignment was recorded.
- Confirm that the priority level was set correctly.
Exercise 2. Generate Line Listing
Objective: Produce a filtered line listing of surveillance records for review or reporting.
Scenario: You are preparing for a weekly surveillance meeting and need a current line listing for discussion. The meeting requires a clear view of disease activity in the parish over a specific period, such as the last two weeks. You may need to narrow the results to one diagnosis, one location, or a short date range. Your goal is to generate a usable list of records that can support discussion, follow-up, and decision-making.
Steps
-
Open the Generate Line Listing tool.
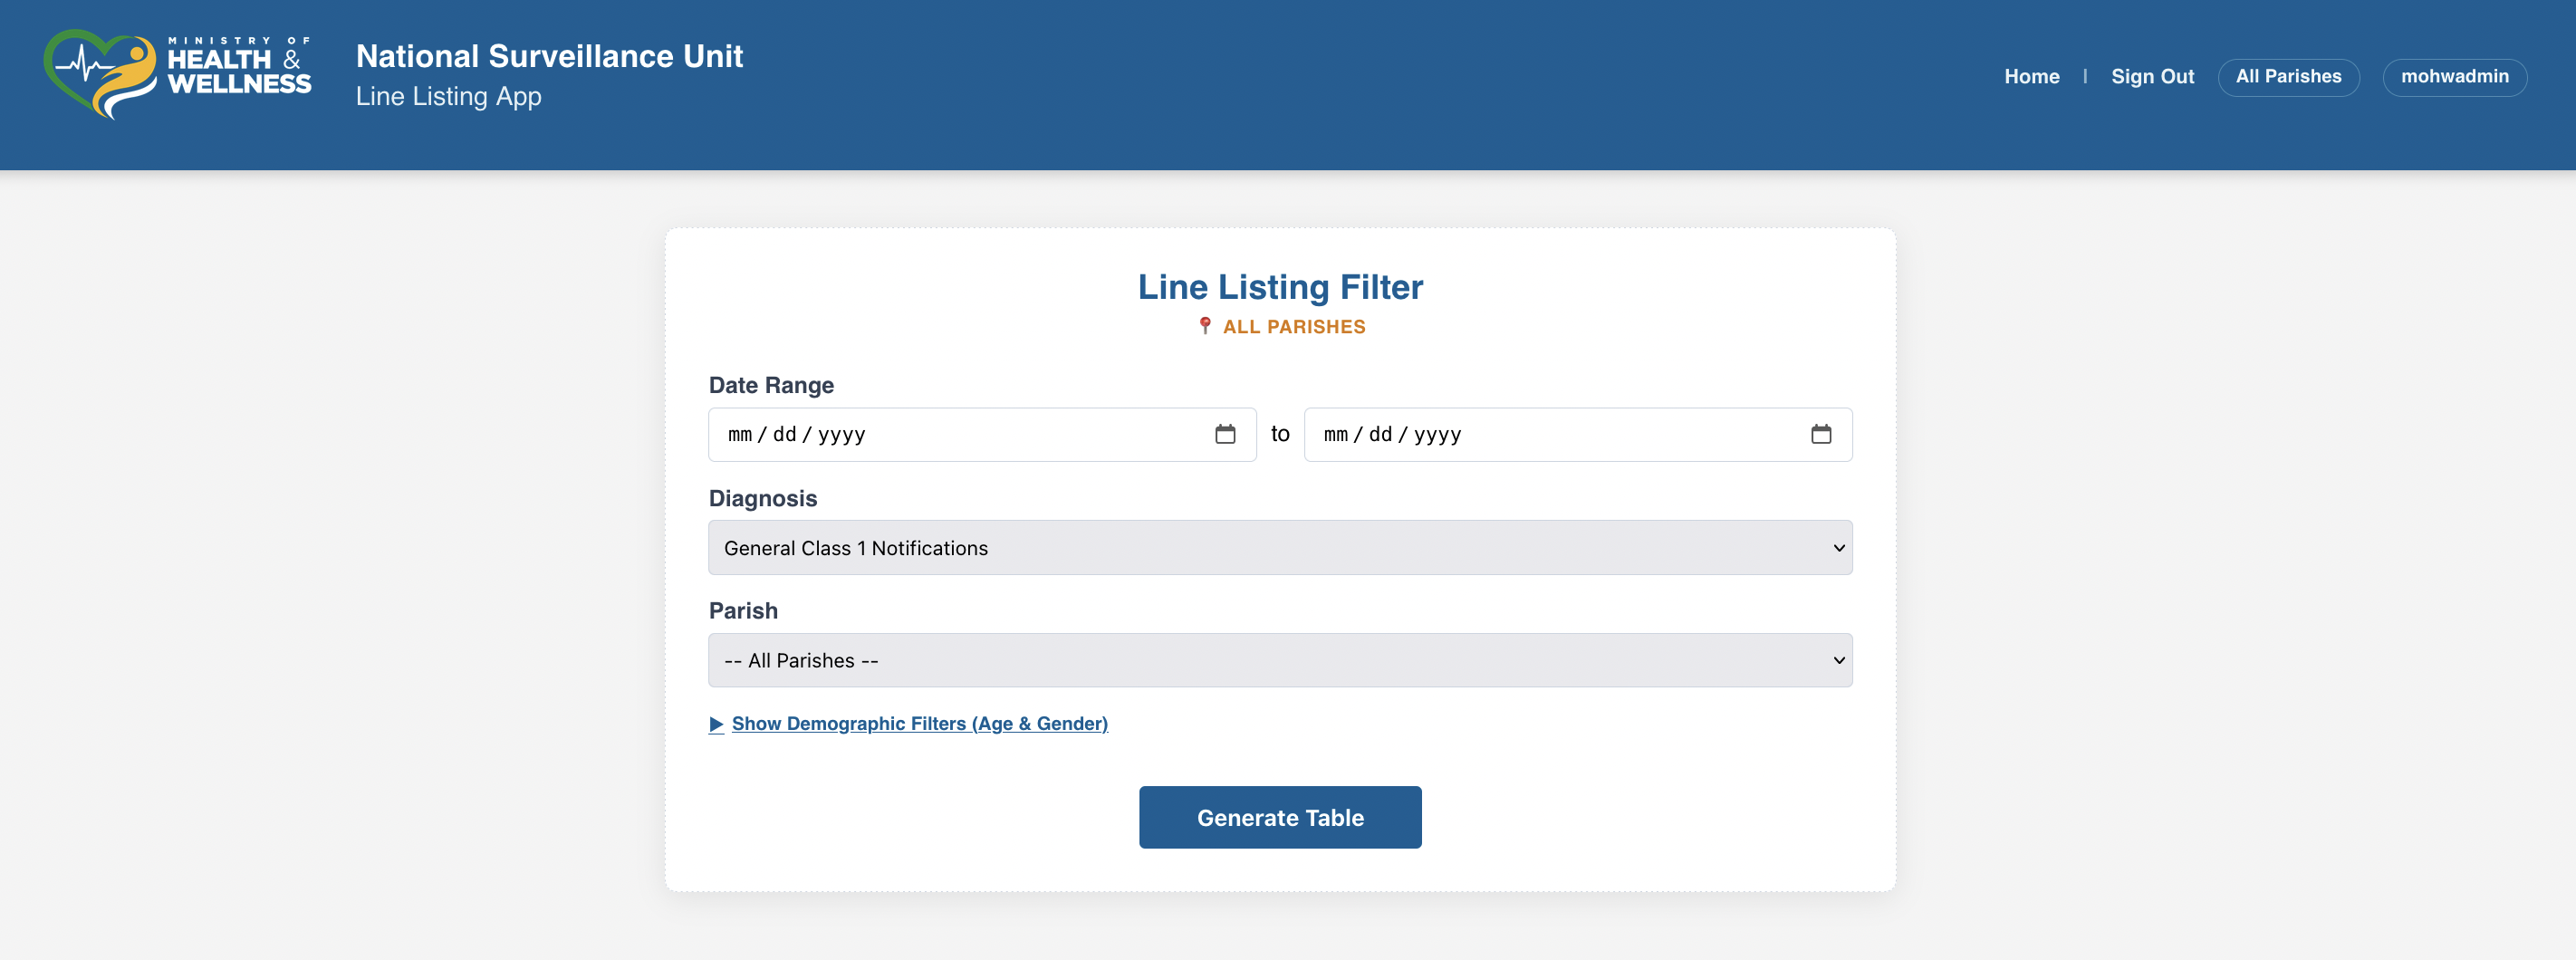
Figure 2.1: Generate Line Listing tool
- Select the disease or condition to review.
- Set the date range.
- Apply any additional filters that are needed.
- Generate the listing and review the records returned.
- Export the results if a copy is required for reporting or discussion.
Expected Result
- A filtered table of surveillance records is displayed.
- The results can be reviewed on screen and exported if required.
Check Yourself
- Does the number of records seem reasonable for the disease and time period selected?
- Are all records within the correct time range?
Exercise 3. Find Case Investigation
Objective: Locate an existing investigation record quickly and accurately.
Scenario: A Medical Officer or another member of staff contacts you for an update on a patient. They may provide only partial details, such as a name, disease, parish, or approximate date. You must search the system, identify the correct record, and determine whether the case has already been investigated. This search may guide the next action, such as follow-up with a field nurse or confirmation that an investigation is already on file.
Steps
-
Open the Look Up Case Investigation tool.

Figure 3.1: Look Up Case Investigation screen
- Search using the patient name or another available identifier.
- Confirm whether a case investigation report exists.
- Review the status of the investigation, if available.
Expected Result
- The correct record is located.
- The status of the investigation becomes clear.
Check Yourself
- Did you retrieve the correct patient record?
- Can you tell whether the investigation exists and whether it is complete?
Exercise 4. Look Up Class 1 Notification
Objective: Retrieve and review the contents of an existing Class 1 notification.
Scenario: A health facility contacts you about a notification that was already submitted. They may want to confirm what information was entered, or they may suspect that something needs correction. As the SPHN, you need to locate the original notification, review the contents carefully, and determine whether the record appears complete and accurate.
Steps
-
Open the Look Up Class 1 Notification tool.
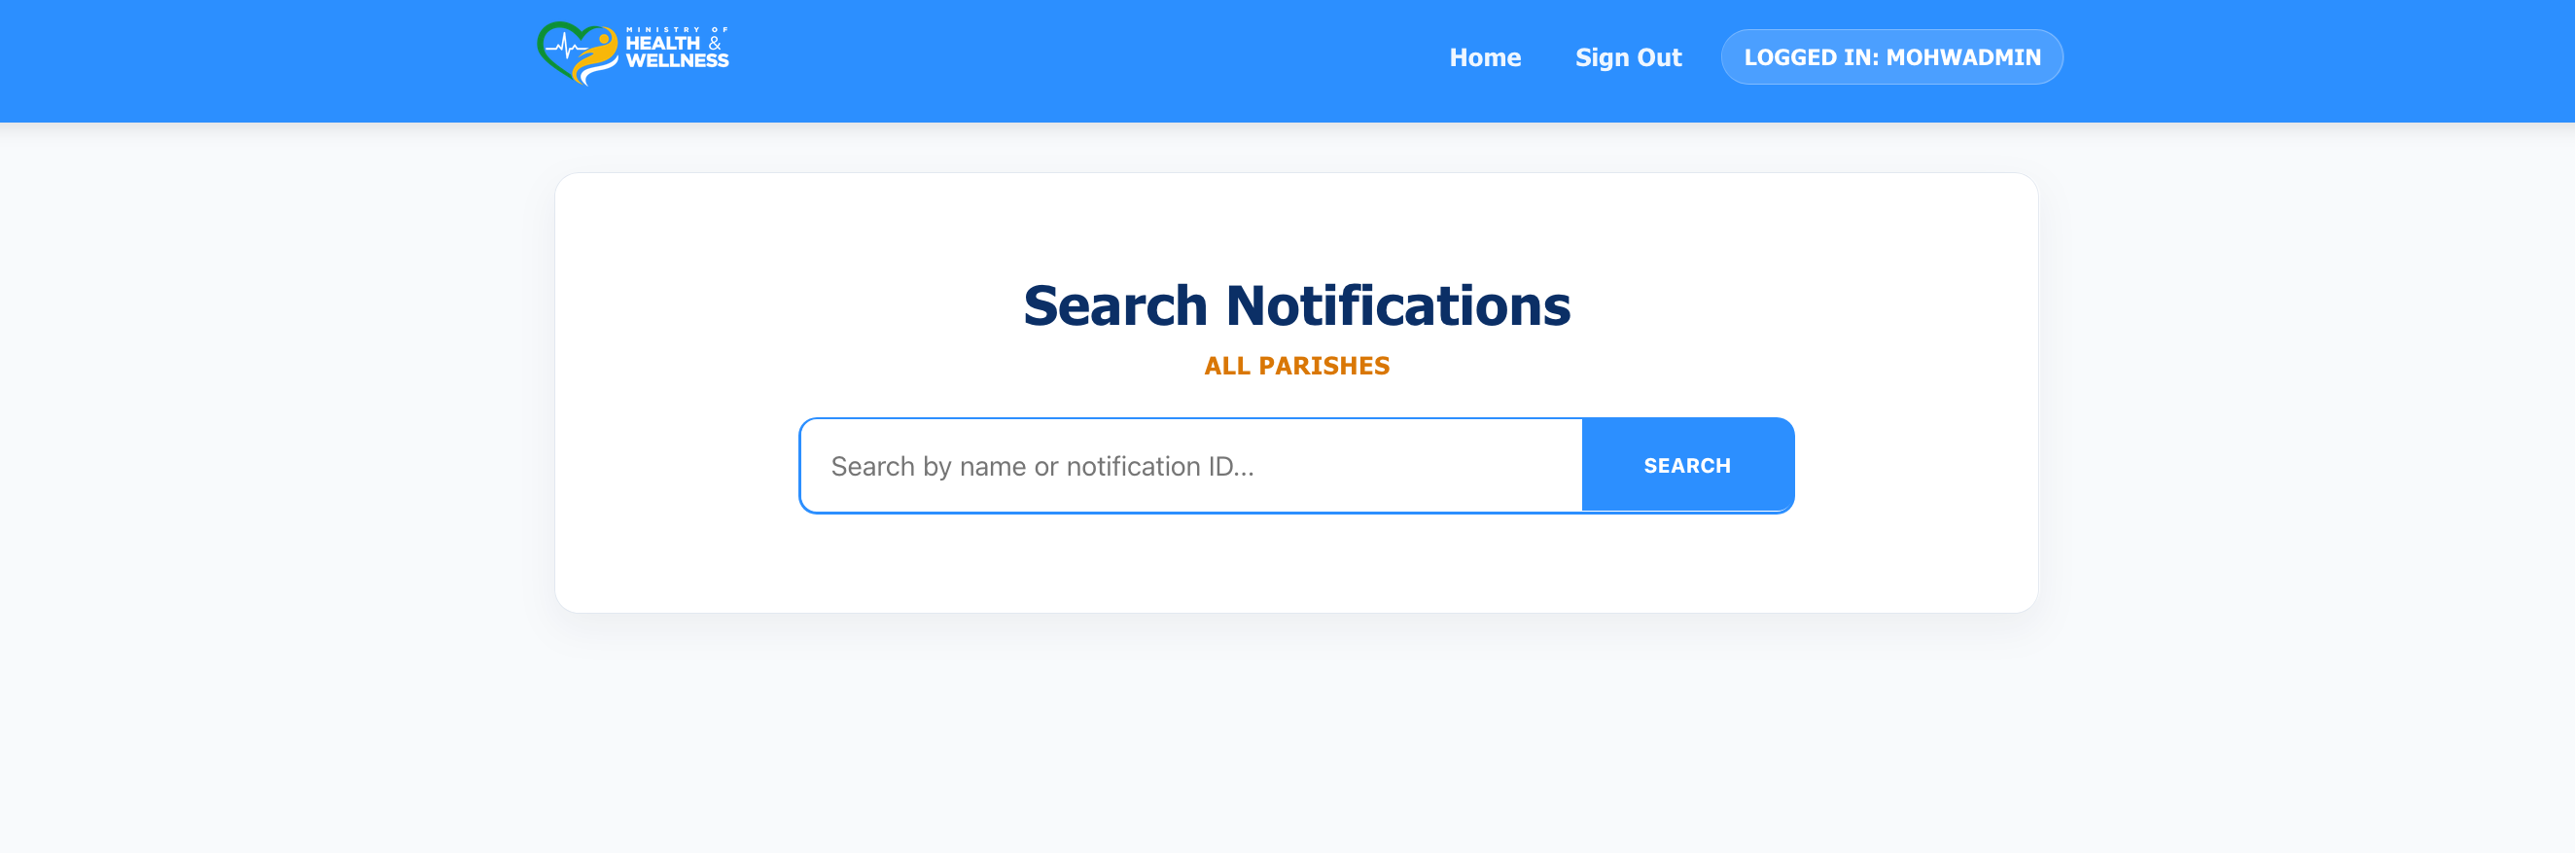
Figure 4.1: Look Up Class 1 Notification screen
- Search using values such as patient name, notification ID, disease, or date.
- Select the correct record from the results.
- Review the details of the notification, including patient information, diagnosis, location, and reporting facility.
Expected Result
- The full notification record is displayed for review.
Check Yourself
- Does the record match the case that was being queried?
- Do any fields appear incomplete or incorrect?
Exercise 5. Submit Case Investigation Form
Objective: Submit a case investigation form when follow-up information must be entered into the system.
Scenario: A field nurse reports that they are unable to submit a case investigation form because of access problems, technical issues, or difficulty completing the form. In some cases, the SPHN may need to guide the nurse through the process. In other situations, the SPHN may need to enter the information directly.
Steps
- Open the Submit Case Investigation Form option.
- Select the correct disease investigation form.
- Enter the required patient and investigation details.
- Complete all mandatory questions.
- Submit the form.

Figure 5.1: Submit Case Investigation Form screen
Expected Result
- The case investigation form is submitted successfully.
- The record becomes available in the system.
Check Yourself
- Did the form submit without errors?
- Can the investigation record now be found in the system?
Exercise 6. Submit General Class 1 Form
Objective: Submit a new General Class 1 notification when a facility cannot do so directly.
Scenario: A health facility contacts you to report a new suspected case, but they are unable to enter the notification themselves. As the SPHN, you may need to capture the information and submit it into the system so that the case can enter the surveillance workflow without delay.
Steps
- Open the Submit General Class 1 Form.
- Enter the patient details.
- Enter the disease or suspected diagnosis.
- Complete the reporting facility and location information.
- Review the form for completeness.
- Submit the notification.

Figure 6.1: Submit General Class 1 Form screen
Expected Result
- A new notification is created successfully.
- The record enters the surveillance workflow.
Check Yourself
- Does the new notification now appear in the system?
- Is the entered information complete and accurate?